This post was last updated on 2021 February 24
I don’t know about you, but the trips I take tend to be planned around one particular thing I’ve been aching to see or do. In the case of my 2012 road trip around the Big Island of Hawaii, the one thing I just HAD to do was the Waimanu Valley hike, on the Muliwai Trail. A coastal walk with glorious views of the rugged Hawaiian coastline, leading you to an off-the-beaten-path paradisaical oasis? Oh I’m SO there.
If you’re into it too, here’s a tip sheet I’ve created for the Waimanu Valley hike: everything you need to know to prepare, complete, and enjoy this Hawaiian hike.
Planning For The Waimanu Valley Hike
Book your campsite ahead of time
Be sure to book one of the 9 Waimanu campsites before you go, and bring a printout of your permit with you on the hike. You can book a Waimanu campsite online for $18/night. You really need to stay AT LEAST 2 nights at Waimanu Valley camping, else most of your time will be spent hiking rather than enjoying the valley. The more nights you can afford there, the better – trust me on this!
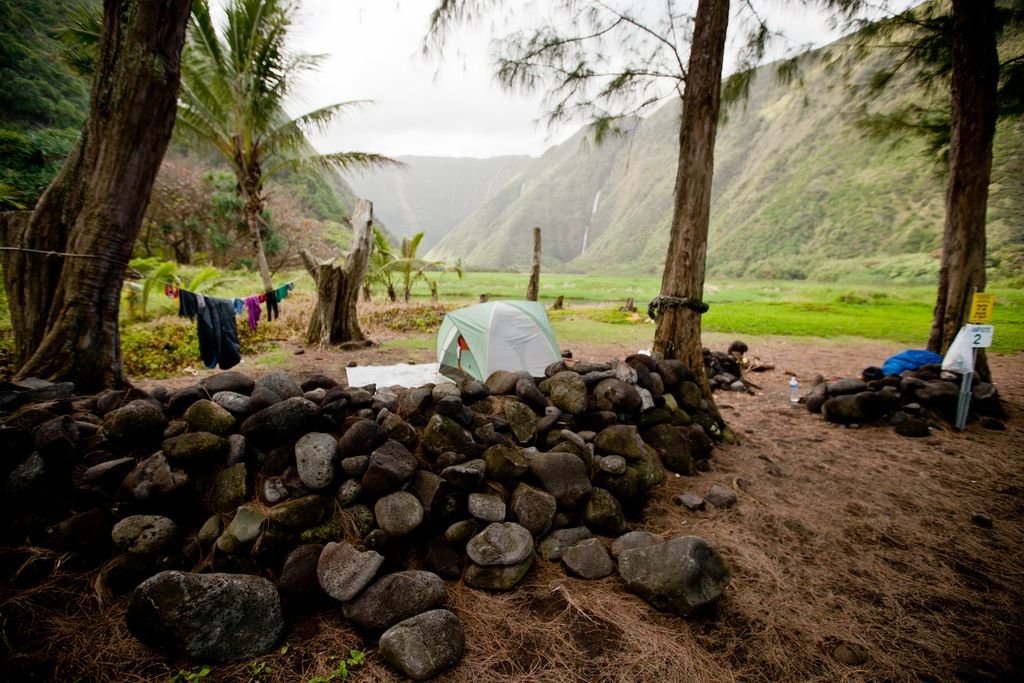
My roommate Lauren and I were there at the very end of January 2012 and only 2 other sites were taken. We had campsite #2, which was the largest – and dare I say, the best – site, with easy access to the beach and a front-row view of the valley and surrounds. Sites 6-9 are more spaced out and less trafficked.

Bring appropriate gear
Being properly equipped for the Waimanu Valley hike is absolutely key to your enjoyment of it. Keep in mind, you are carrying everything you need to survive for a few days in the wilderness on your back: your tent, your food, your sleeping bag, your clothes, your random crap. You WILL feel this weight after several hours of carrying it. If you do not have a high quality backpack, comfortable hiking shoes, and trekking poles you will be in a world of pain!
Here are the things you absolutely must pack for the Waimanu Valley hike:
- Comfortable, broken-in [easyazon_link identifier=”B01HFL9KV6″ locale=”US” tag=”frugafroli-20″]hiking boots[/easyazon_link]
- A comfortable, well-fitting [easyazon_link identifier=”B01CQA7MZC” locale=”US” tag=”frugafroli-20″]backpack[/easyazon_link]
- [easyazon_link identifier=”B007YT854S” locale=”US” tag=”frugafroli-20″]Trekking poles[/easyazon_link] (or alternatively, find sticks along the way as we did)
- [easyazon_link identifier=”B012EZCNTE” locale=”US” tag=”frugafroli-20″]Sleeping bag[/easyazon_link]
- [easyazon_link identifier=”B00MTZQ66G” locale=”US” tag=”frugafroli-20″]Inflatable mattress pad[/easyazon_link]
- [easyazon_link identifier=”B01IVRSGT0″ locale=”US” tag=”frugafroli-20″]Tent[/easyazon_link]
- [easyazon_link identifier=”B001AIBJNS” locale=”US” tag=”frugafroli-20″]Hammock[/easyazon_link]
- [easyazon_link identifier=”B0023FDQ2O” locale=”US” tag=”frugafroli-20″]Water purifying droplets[/easyazon_link]
- [easyazon_link identifier=”B00OXH67B2″ locale=”US” tag=”frugafroli-20″]Water shoes[/easyazon_link] (for crossing any streams or rivers along the way)
- [easyazon_link identifier=”B0745K51TT” locale=”US” tag=”frugafroli-20″]Blister pads[/easyazon_link] (these will save you on the hike back out!)
- Matches/lighter for campfires
- All cutlery and cooking supplies needed to prepare and eat meals
- A sharp, preferably thick knife (for cutting coconuts!)
- [easyazon_link identifier=”B06W54SBSL” locale=”US” tag=”frugafroli-20″]Headlamp[/easyazon_link]
Note: The links above are for the products I actually used on the Waimanu Valley hike, or the closest thing I could find to it.
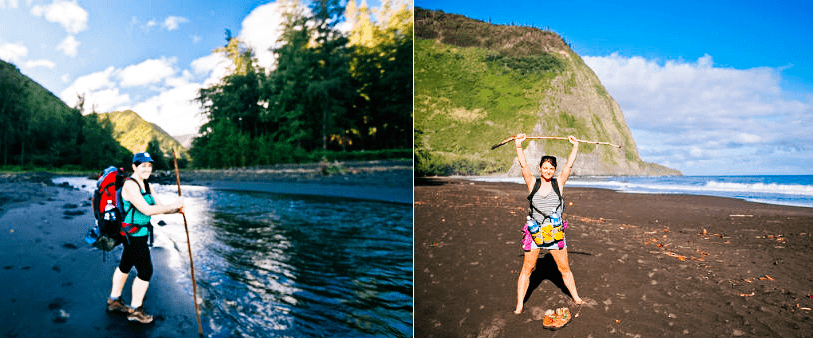
Walking across Waipi’o Beach with all our gear
Stock up on food once on the island
Whatever you plan on consuming while in the valley you’ll need to bring in with you. Assuming you’ll fly into Hilo or Kona, hit the supermarket in one of those cities to stock up on supplies before you hike in. Some easy, hearty meals you can cook over a campfire are vegetarian chili and pasta. These may not be the lightest items to pack in your bag, but your body will thank you for feeding it proper meals after all that trekking, vs. chips and candy and other crap food.
Getting To The Waimanu Valley Trailhead
Where to park
Aim for the Waipi’o Valley Lookout when looking for a place to park your car during the trek. Based on this source, we had planned to leave our car at the nearby Waipio Valley Artworks for a few days, willing to fork over some money to ensure its safekeeping. But when we got there the morning we were to start the trek, the gallery was closed. You may have to call and pre-arrange your parking with them, but we didn’t know this beforehand.
We came up with an impromptu Plan B, which was to return to the lookout and start driving down to the beach. This road is no joke – it is steep as all hell, and you have to CRAWL down it ever-so-carefully. Coming back up is equally challenging – I wouldn’t attempt this in anything other than a 4WD car.
Once you’ve made it through the steep part, you’ll reach level ground as the road continues toward the beach. We found a little clearing on the left side of the road in the trees where another car was parked, so we left our car there and hoped for the best! Our guidebook recommended leaving car doors unlocked with all valuables removed to discourage break-ins. From there, it was a 10 minute or so walk to Waipi’o Beach to start the trek.
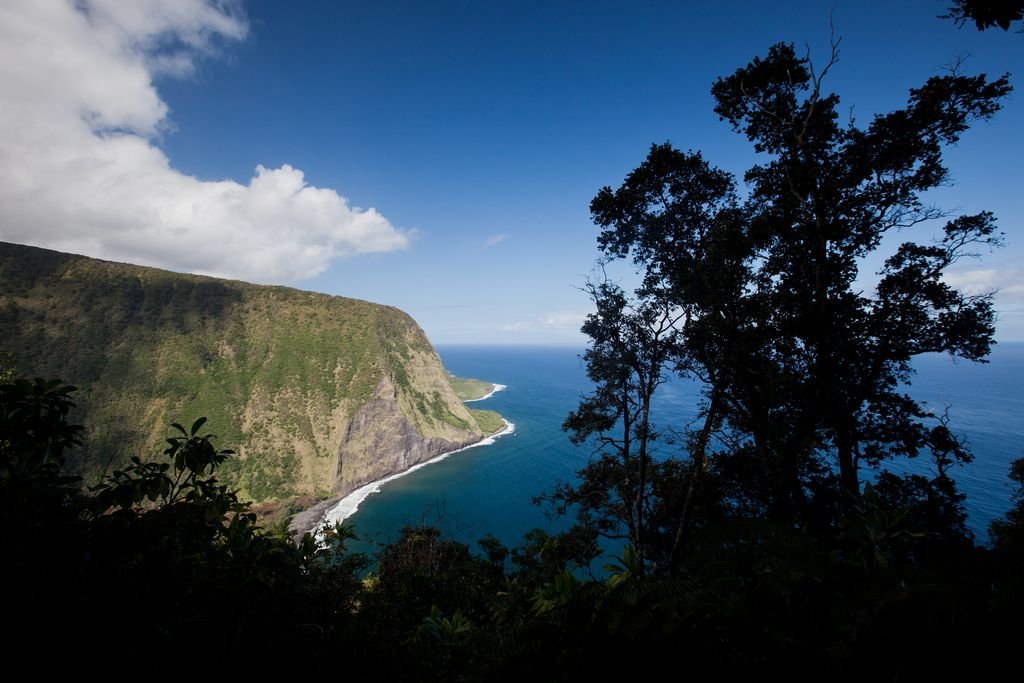
Waipi’o Beach. See all those switchbacks heading up the cliff? ROUGH.
On the trail
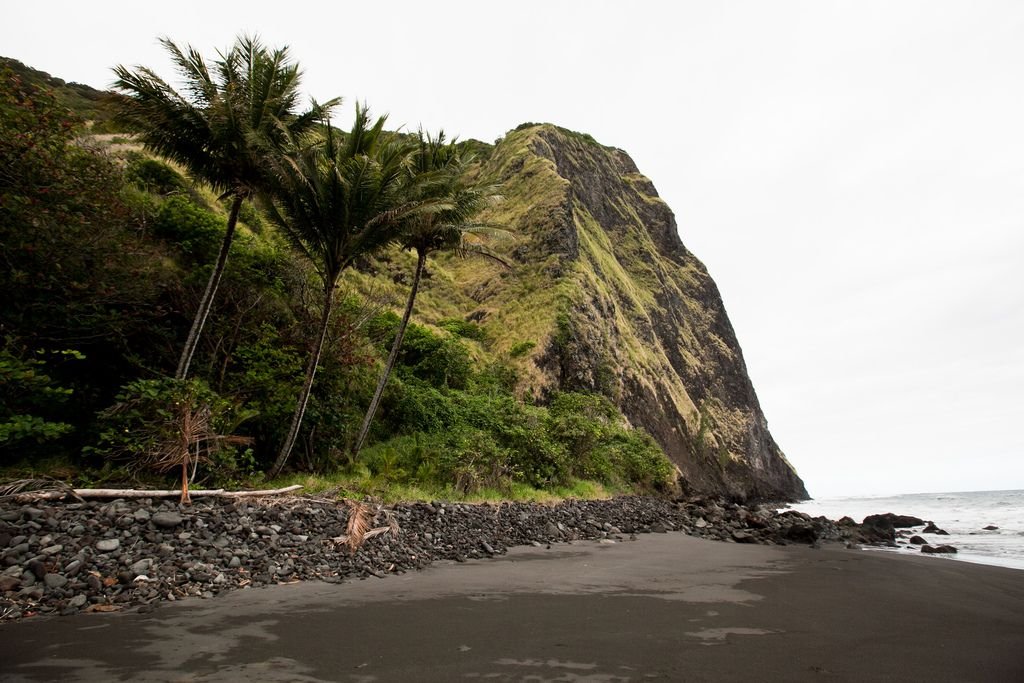
From Waipi’o to Waimanu, it’s 9 miles of constant up-and-down hiking. The first mile is fraught with switchbacks as you climb out of Waipi’o Valley and will demand at least half of your water supply. The remaining 8 miles are slightly less strenuous, but after several hours in the sun carrying heavy weight on your back, you will feel it. Aside from a couple small waterfalls along the way, there’s not too much in the way of scenic vistas on the trail because you’re hiking slightly inland rather than right on the coastline.
While I typically try to enjoy the journey as much as the destination (if not more), I have to say that in this case it was ALL about the destination. The entire time I just wanted to get to Waimanu Valley and collapse in my hammock. That’s not to say the trail is boring or unpretty or too challenging, because it most definitely isn’t. Rather, I was ill-equipped with a mediocre backpack that did not distribute weight well.
I found that rearranging my items alleviated some of the pain: for instance, you don’t want to attach your tent or sleeping gear to the very bottom of your backpack, but rather center it vertically down the front of your pack. The shoulder pain was nearly unbearable at times, and all I could do was count down the helipads we passed as we approached our promised land.
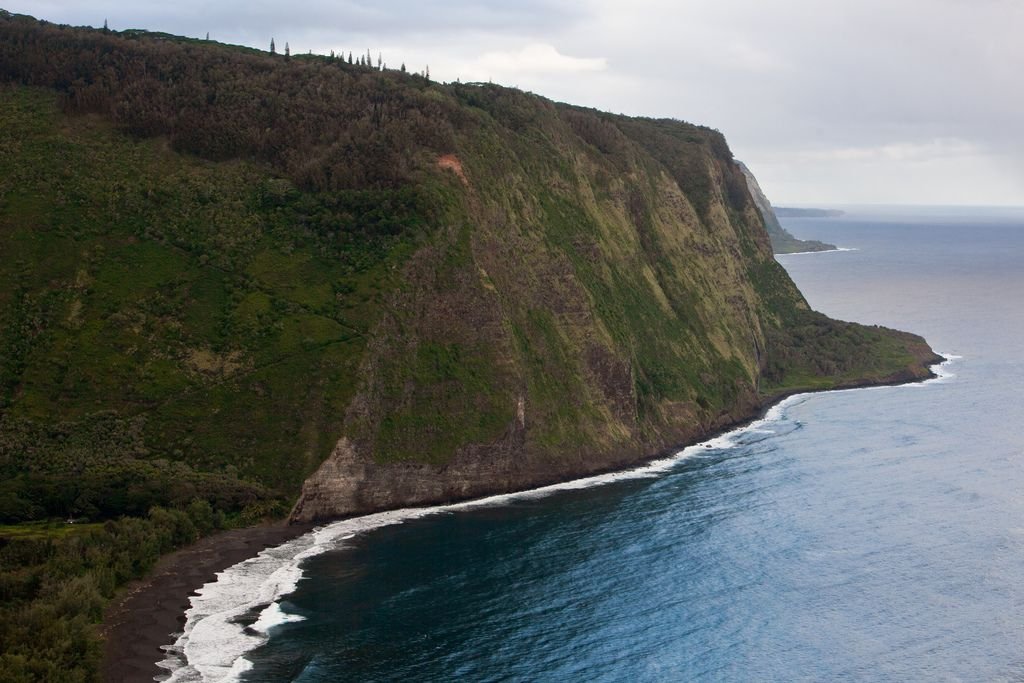
View over Waipi’o Valley and beach.
The trail undulates in and out, up and down. Each time we rounded a corner, I prayed that it would be the last one – though clearly, most times it wasn’t. But once you do reach that final corner, you’re rewarded with a stunning view of the coastline, not unlike the one from the Waipi’o Lookout.
Be warned that the descent into the valley is steep, and if there’s been any recent rain (likely there will have been), it’ll also be slippery and muddy. This is when you’ll thank yourself for lugging along your trekking poles to help keep your balance.
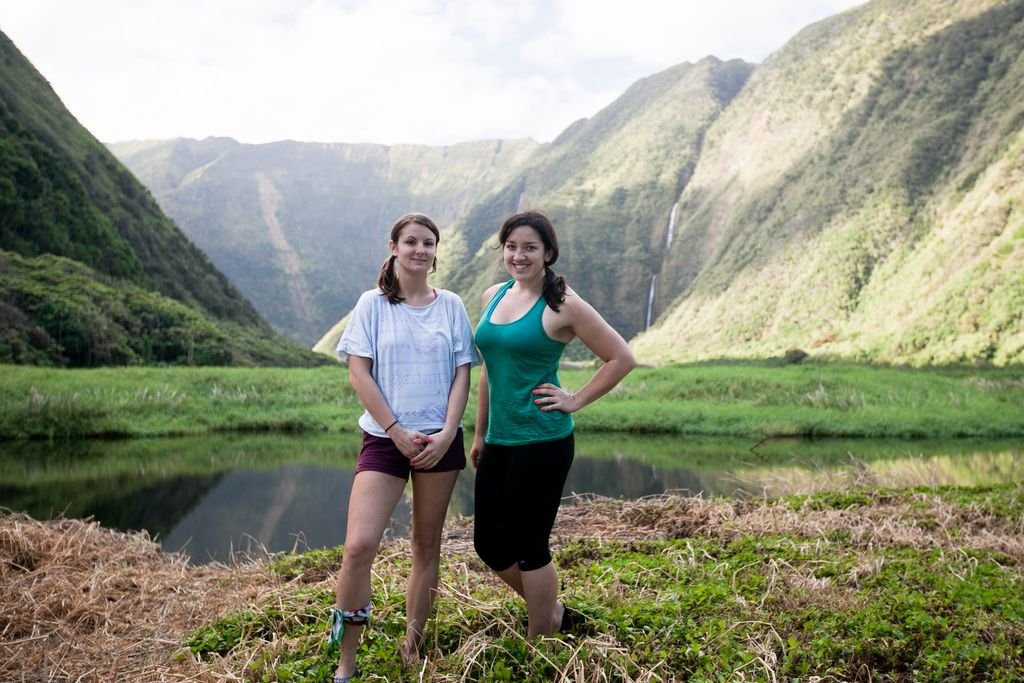
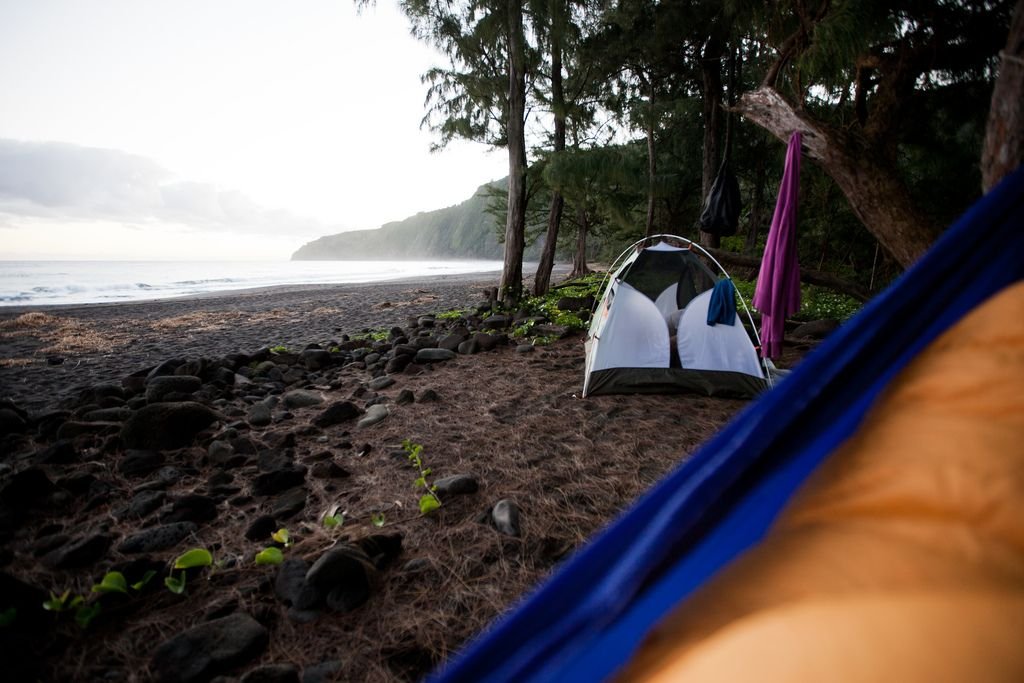
In Waimanu Valley
I quickly forgot about the hardships we’d endured on the trail once we arrived at Waimanu Valley because, well, look at it:
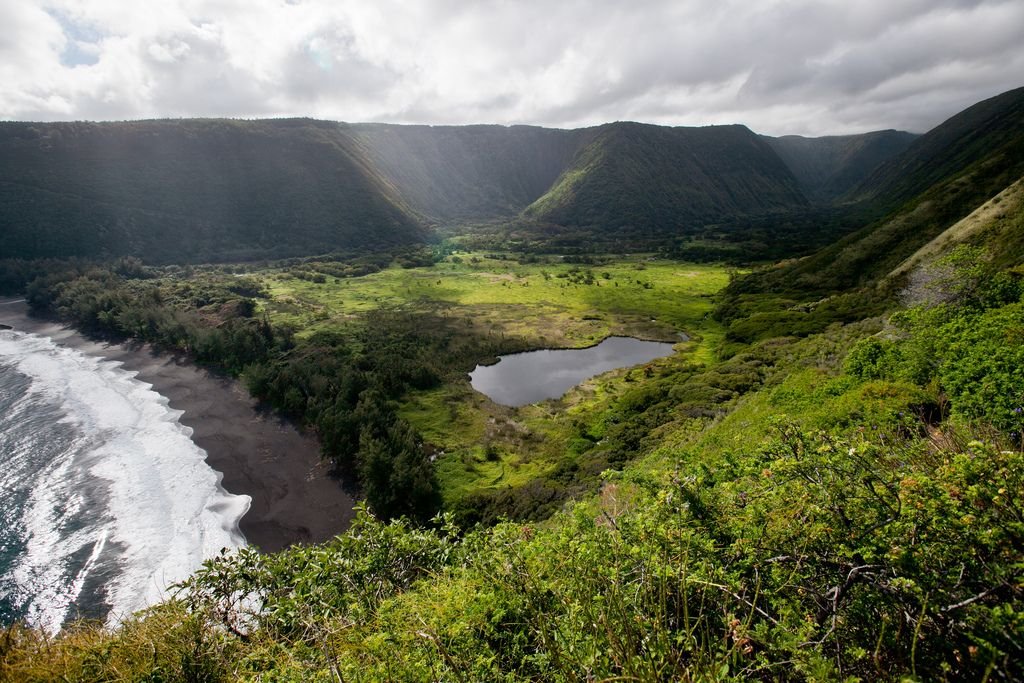
View of Waimanu Beach
This Hawaiian shangri-la was the light at the end of the proverbial tunnel for us, and I was about two seconds away from hugging trees and kissing the ground in gratitude before I got distracted by our new digs. The beach! The valley! Waterfalls! And ooh, two perfectly-spaced trees from which to hang my hammock!
We had nearly two full days to enjoy Waimanu Valley camping, Robinson Crusoe-style. We didn’t do much other than just be, but there are a few things there worth mentioning:
Waimanu Beach
With all campsites nestled between the beach and the valley, there’s no escaping the black sandy shores of Waimanu. Not that you’d want to – this is Hawaii, for cripes sake. Lauren ventured into the freezing cold water for a bit of a swim, while I laid back in my hammock enjoying a view of the water on one side and the valley on the other.

Want to sleep more comfortably in the trees? Check out this tree tent guide by Globo Surf.
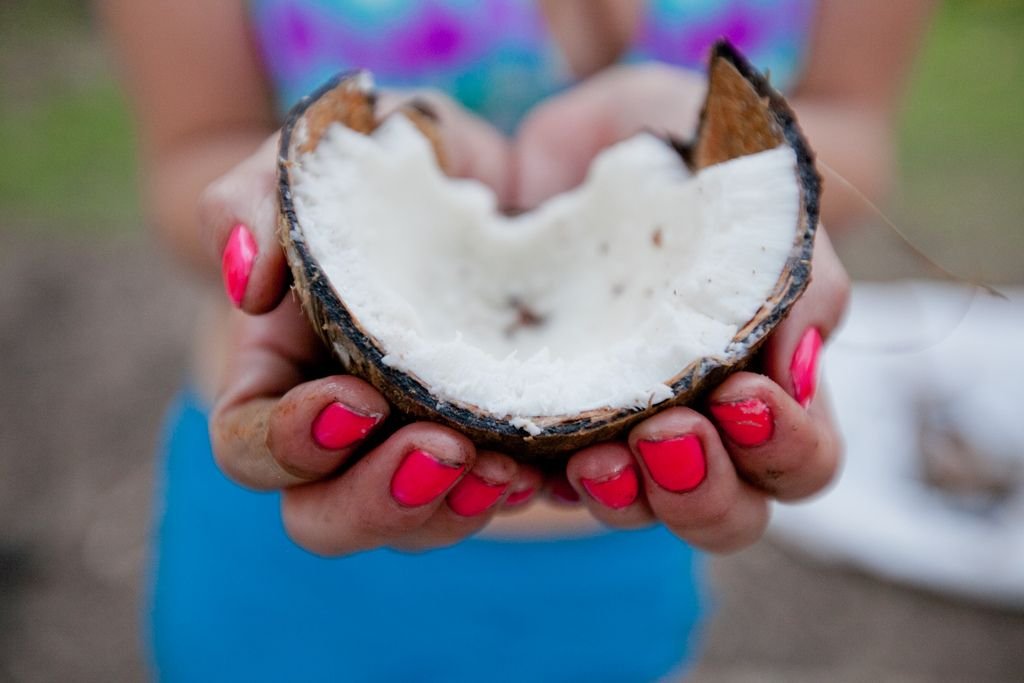
Coconuts
Despite all the research I’d done beforehand, there was one thing that surprised me on this trek: all the harvestable coconuts at Waimanu Valley! There are few things more gratifying than knocking down a coconut from a tree on a hot day, breaking it open yourself, and quenching your thirst with some fresh coconut water. Coconuts with a browner shell are older and house delicious coconut water for drinking, while those with a greener shell are younger and better suited for eating the flesh inside.
Our harvesting technique was less than refined: all we had was a butter knife and some rocks to smash the coconuts into. Once in awhile, we’d bother our Mountain Man neighbor and use his machete to cut them open.
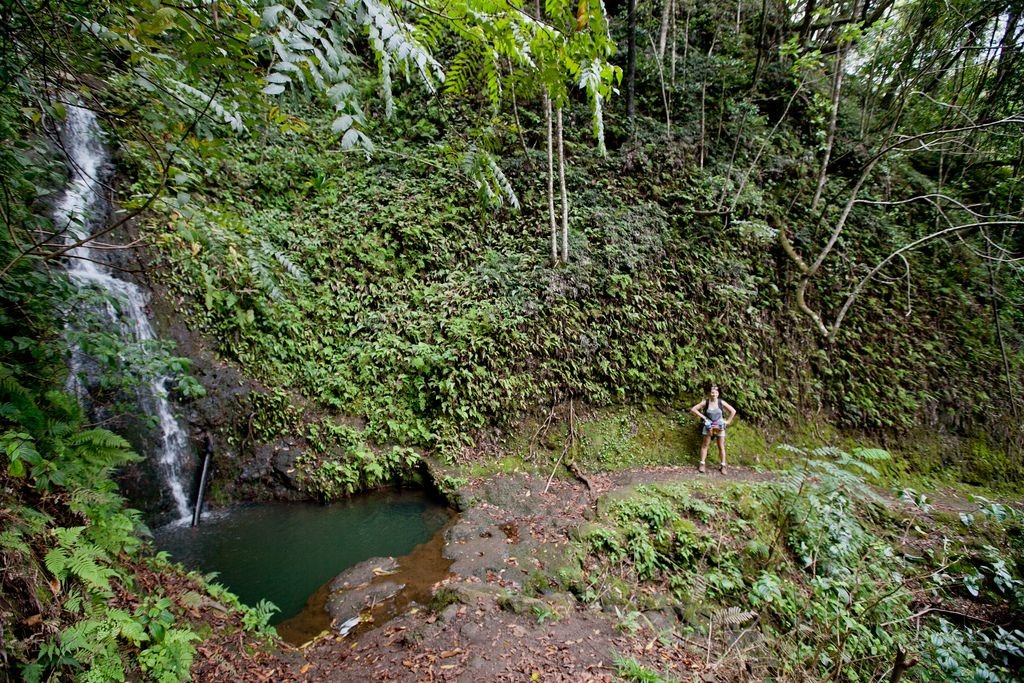
Water(falls)
Whenever thirst or restlessness hit, we’d venture through the other campsites toward the stream to refill our bottles with water (purifying it before consumption, of course). Following the foot path inland from the stream, it would theoretically lead us to the waterfalls that we could see from our campsite. But what do you do when the path suddenly vanishes and you’re in the middle of the woods?
If you’re me, you follow a hunch and head off in one direction before getting hopelessly lost and bitten by bugs. It was the most puzzling thing because we could hear the falls and get close to the stream leading out from it, but no path we took led us to the actual waterfall. Following the stream up to the falls was impossible with all the overgrown bush, fallen trees, and other obstacles standing in the way. When our frustration reached an intolerable level, we decided to cut our losses and head back to camp.
Per my post-trip research, it should have taken us about an hour to hike to the falls. I suspect we lost the trail early on and should have gone further out in order to cross through to the other side of the stream. But no matter – much like in Pai, Thailand, the best thing to do in Waimanu Valley is nothing!
Post- Waimanu Valley Hike
Trekking out was slightly less arduous without carrying cans of non-perishable food on our backs, but it would have been wise to leave early enough in the day to complete the hike before sundown. We were hiking down the steep switchbacks into Waipi’o with limited light, which wasn’t the safest way to go.
Upon reaching the gorgeous Waipi’o Beach at sunset, where our epic trek had begun, we said screw it – let’s camp here for the night. Lauren set up the tent, I hung up my hammock, and we made instant mashed potatoes for dinner. I woke up the next morning to see a Hawaiian beach sunrise on my 27th birthday – doesn’t get much better than that!
The Waimanu Valley hike is one of the greatest adventures I’ve ever had. If you take it on, just be sure to come prepared!
Waipi’o Beach, as seen from my hammock.