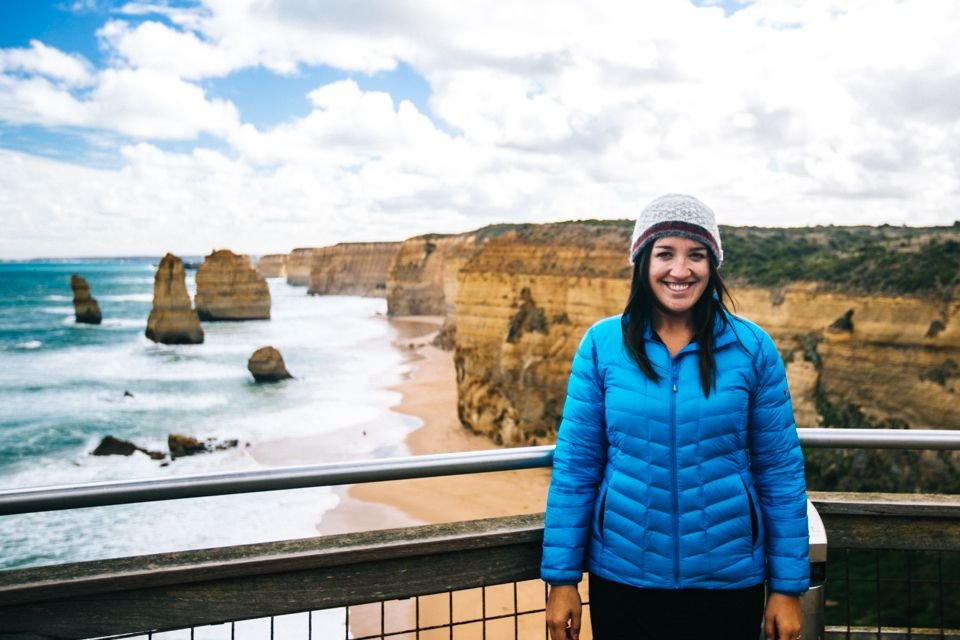
I often feel out of place in this travel blogging world. I didn’t get into it because I love to write, and I don’t plan to make a living freelance travel writing or managing social media accounts.
Once upon a time, I moonlighted as a wedding photographer while holding down a standard corporate American office job. When I left that job in 2013 to travel Southeast Asia for 5 months, I felt a huge shift in me. I knew in my heart that I didn’t ever want to be a full time wedding photographer, but I wanted to keep taking photos and sharing my unique views with the world. This travel blog has bridged the gap for me as I’ve gradually transitioned out of wedding photography and into travel photography.
I started this travel blog as an outlet for my travel photography. I may not have a clue what I’m doing writing these posts, but I sure know what I’m doing when a camera’s in my hands. With over 10 years of practicing photography (the latter half of that being professionally), I’ve carefully honed my skills with both cameras and editing software – and I’m still learning! But I thought I would share with you what works for me in terms of my travel photography workflow. Read on for all my photo secrets!
Note: I drop a lot of photo-related words here (e.g. preset, aperture, ISO). This is more of a what-to than a how-to guide, so feel free to consult Google as needed!
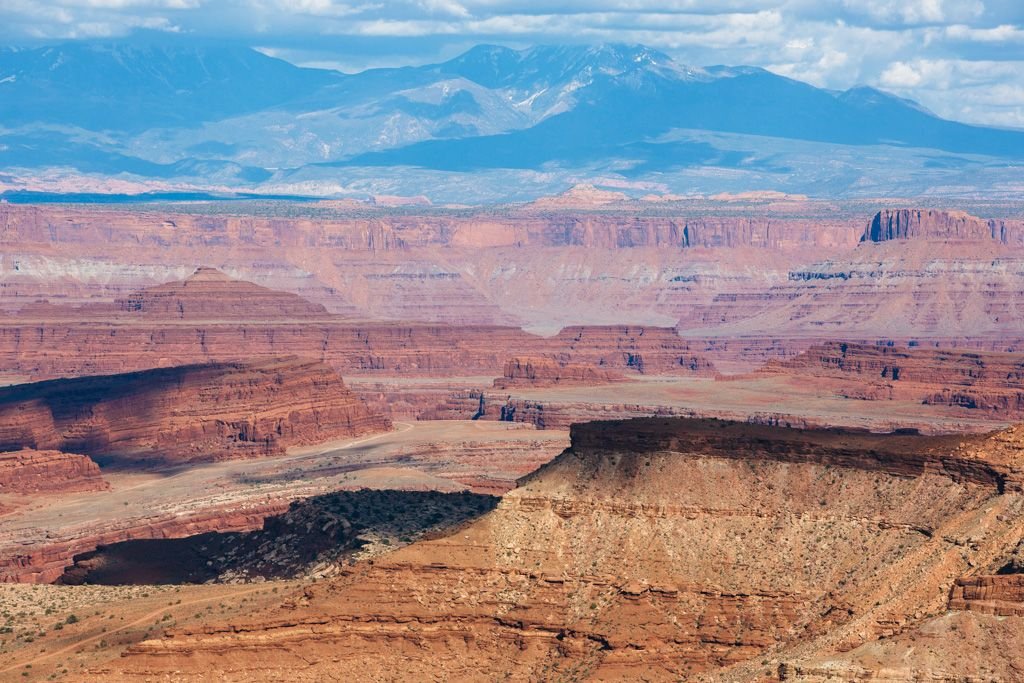
Landscape photography in Canyonlands National Park, Utah.
Taking Photos With The Canon 5d Mark III
When it comes to taking insanely awesome travel photos:
- It matters which camera you use. Sure, you might get some lucky snaps with your iPhone, GoPro, or point-and-shoot camera, but they won’t be as artful as if you had taken those same shots with a professional level SLR camera and lens. Pay for quality and you get quality, it’s that simple.
- It also matters how skilled you are at using your camera. You can have the fanciest camera and lens on the market, but if you don’t know how to use your gear, you won’t get amazing images.
In other words: If you want to improve your travel photography, you should invest as much money as you can in your camera gear and as much time as you can in learning how to use it. I’m not saying go out and buy the most expensive camera and then try to teach yourself photography – that might be a little foolhardy if you aren’t already a proficient photographer. Instead, buy a camera appropriate for your skill level and practice your photography; then once you outgrow it, consider upgrading to a better camera.
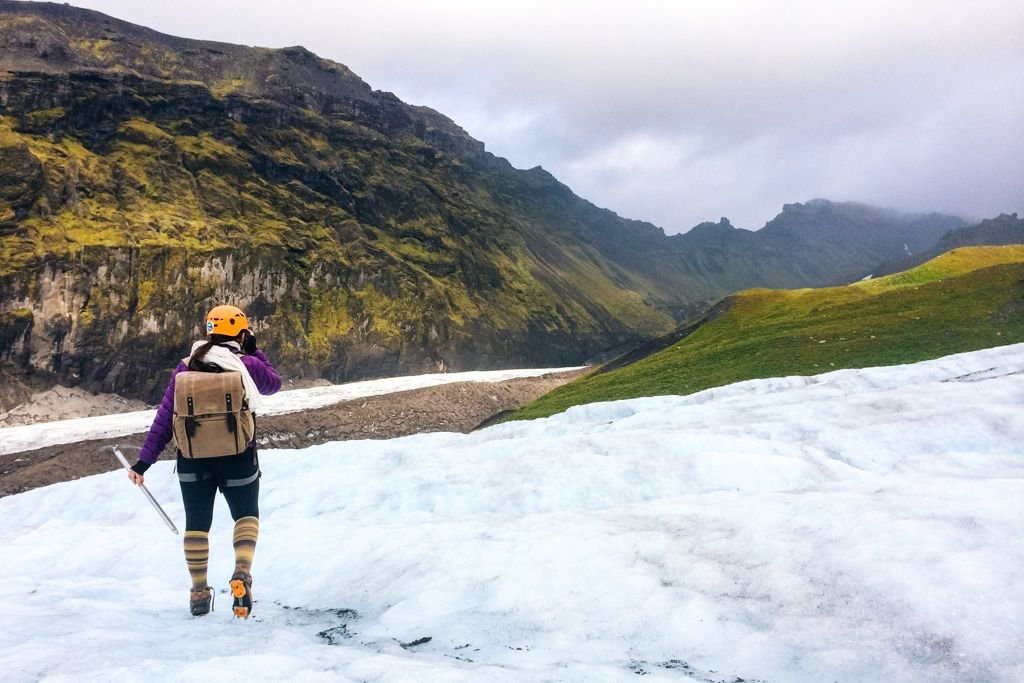
Shooting a glacier in Iceland. Note the sweet ONA backpack I’m rocking!
My Camera Gear For Travel
I have a somewhat unconventional setup for travel and carry about 12kg worth of camera gear. It’s heavy, cumbersome, and a complete pain in the arse when it comes to flying – but I wouldn’t change a thing about it, because this gear is exactly what I need right now in order to bring home the travel images I want.
Here’s my camera gear for travel:
- Canon 5d Mark III & II – I kept the Mark II as a backup for shooting weddings when I upgraded to the Mark III, and after my Mark III broke in Thailand I now travel with both cameras. The Canon 5d Mark III is amazing in almost every way – in particular, it excels in low light situations (something the Mark II lacked) and takes great video.
- Canon 16-35mm f/2.8L – A sturdy wide angle lens that I rely on for epic landscape photos and architectural street shooting. It stays on my camera most of the time. I’d be utterly lost without this lens in my travel kit!
- Canon 50mm f/1.8 – A tiny plastic lens that can be had for less than $100, this is the thing I throw on my camera when I’m not planning on shooting much but want to have it with me just in case. This is far from the best lens Canon has to offer, and it’s not particularly great for travel photography, but it’s great value for what it is. I mostly just wanted something at a focal length that my two zoom lenses don’t cover, so a 50mm was ideal.
- Canon 70-200mm f/2.8L IS – I don’t know anyone else crazy enough to travel with this lens. This beast weighs 3 lbs and is the big white lens that paparazzi and sports photographers use. It’s perfect for shooting out the car window while on roadtrips. It’s also invaluable to me on hikes and treks when I want to shoot wildlife or landscapes that I can’t get close to. I don’t even think twice about lugging it with me on overnight treks when I’m already carrying a massive heavy backpack – that’s how much I love and depend on it for great travel photos.
All of the above, along with accessories, my laptop, and other random bits and bobs, fit quite nicely in my ONA Camps Bay backpack.
See also: my Travel Resources page
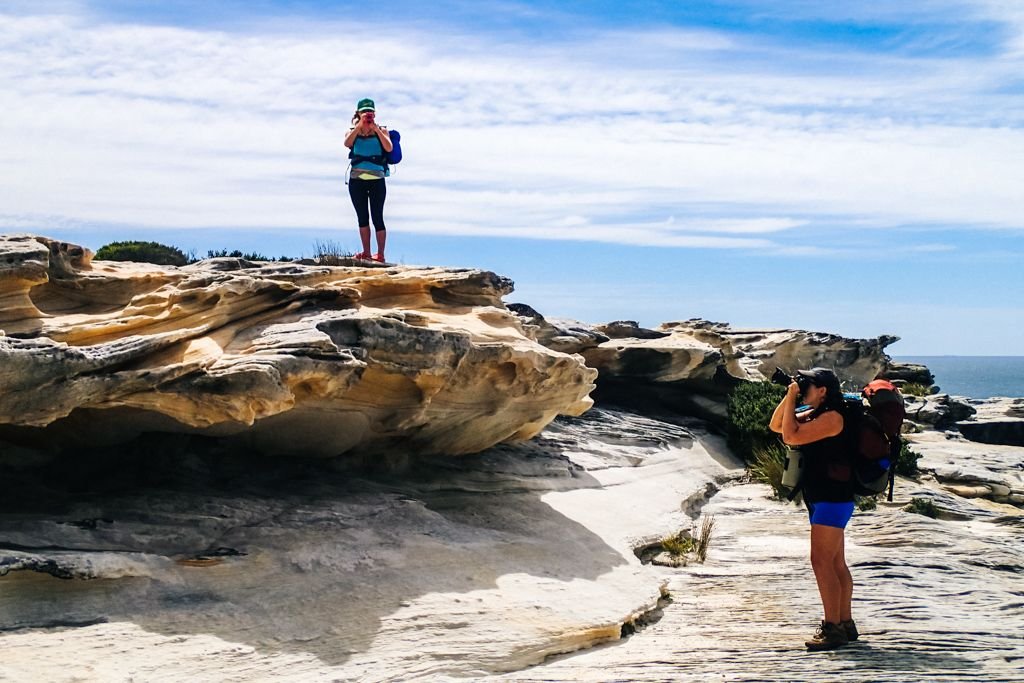
Shooting the Royal National Park Coastal Track. Photo credit: Brooks Smith (edited by me)
My Camera Settings For Taking Travel Photos
Unfortunately there’s no recipe you can follow that will result in amazing travel photos every single time, so you have to experiment and see what works for you. Learn about aperture and shutter speed and how they relate to exposure. Practice like CRAZY, even when (nay, especially when) you’re not traveling.
My settings and technique vary from image to image, but in general here’s what I do:
- Use a polarizing filter – I keep this on my wide angle lens at all times (except when indoors) because a). it protects the lens, and b). it makes the image more contrasty, brings out the blue in the sky, and cuts down on unwanted glare and reflections.
- Shoot in manual mode – Usually I choose my desired aperture and then set the shutter speed accordingly so that the frame is properly exposed, but occasionally I might set my shutter speed first (e.g. when shooting the night sky or a waterfall, where movement is more important to capture). If you’re not ready to shoot in full manual mode, I’d recommend putting your camera on Av mode (aperture priority) rather than auto so that you at least have control over the aperture.
- Shoot landscapes with aperture f/7.1-f/9.0 – When I want everything in focus, I up my aperture to at least 7.1 – higher if I’m shooting with my 70-200mm telephoto lens.
- Shoot at aperture f/2.8 and lower when I want a blurred background – My two zoom lenses only go down to f/2.8, but my 50mm lens goes to f/1.8. If I’m shooting people or want to isolate objects in a scene, my aperture will usually be as low as possible in order to blur out the background.
- Keep the ISO as low as possible – When you have less light to shoot in, you may need to increase your ISO so that the image isn’t too dark – but be careful because if you set the ISO too high, the image may turn out grainy and noisy.
- Shoot RAW – RAW files are much larger and less processed than JPG files, but they capture much more information in each shot which gives you far more options for editing. If you shoot RAW, you absolutely must process and edit the file and save the final image as a JPG if you want to do anything with it – it’s not like an iPhone where you can just shoot and share the image immediately.
Shot at f/2.8, putting me in focus with the background slightly blurred (but not too much, since it’s a wide angle lens).
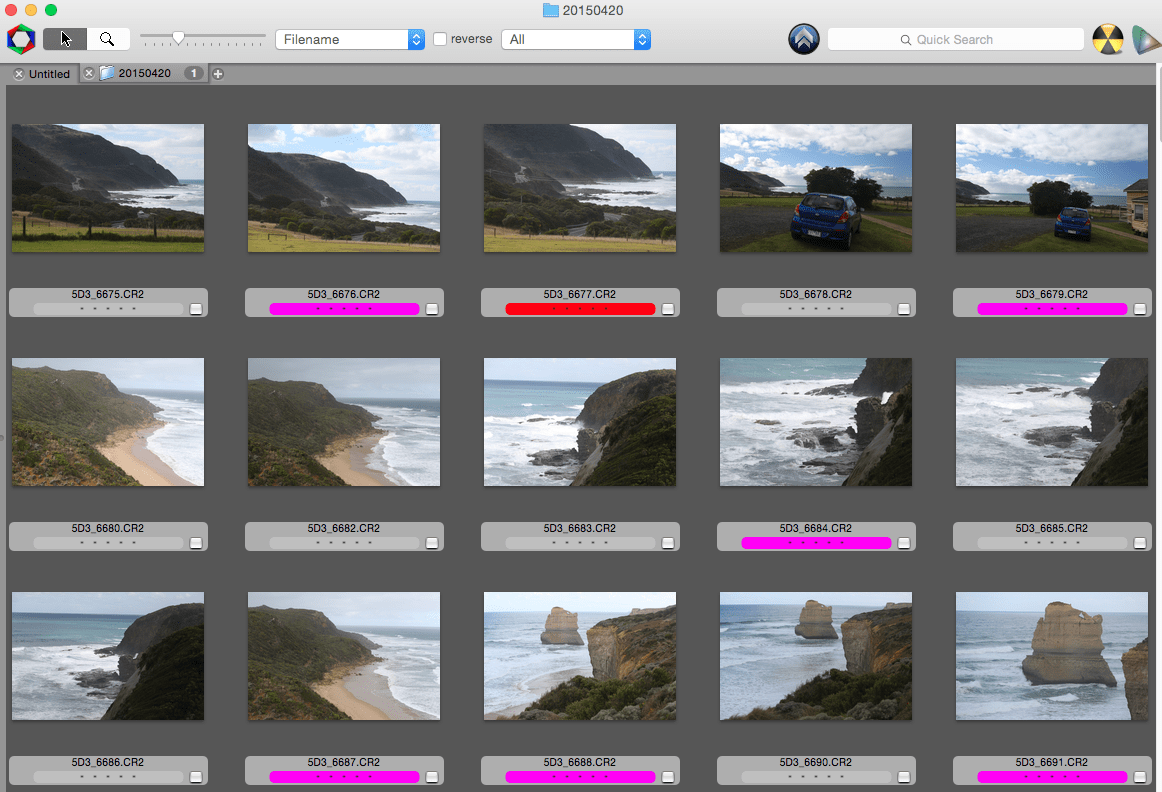
Culling Photos with Photo Mechanic
Anyone else take at least 10 of the same shot when trying to adequately capture a scene? Man, it’s so painful having to sort through them all afterwards and pick the best one to edit and share, especially when you have a slow computer or photo editing software.
That’s why I’m so thankful that early on in my photography career, I discovered the wonder that is Photo Mechanic. This nifty ‘workflow accelerator’ allows you to open a folder of images and sift through them at lightning speed. I have literally saved WEEKS of my life not having to browse my RAW files in slow-loading Lightroom or Photoshop.
My process for culling photos with Photo Mechanic looks like this:
- Open folder of RAW images (each date gets a separate folder).
- Browse images and mark any keepers as 1’s (pink).
- Mark any images I REALLY like as 2’s (red) or love as 3’s (orange) – I’ll later pull from these when I want to share a few on social media or add to my portfolio.
- Filter by Color Class, then highlight and drag the 1’s, 2’s, and 3’s (pinks, reds, oranges) separately into Lightroom to be imported for editing. The file ratings don’t carry over from Photo Mechanic to Lightroom, so I re-star the images once they’re in Lightroom.
After this quick and painless culling process, I’m left with only the best images to edit in Lightroom – far less overwhelming!
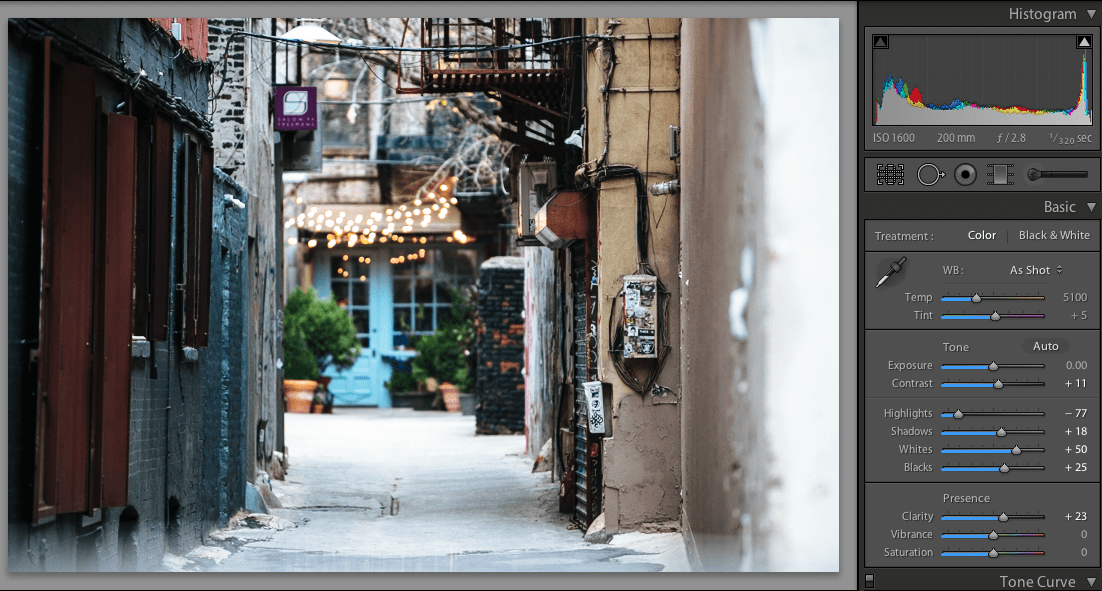
Editing Photos With Lightroom
Just like there’s no one recipe to follow when taking photos, there’s also no one recipe to follow when editing photos. Both require copious practice and experimentation! My editing software of choice is Lightroom because it’s simpler and has a better workflow than Photoshop, but either will do the trick.
My Lightroom Settings
It took me a long-ass time to come up with an image editing style that really worked for me. I recommend downloading Lightroom presets from VSCO (yes, the same VSCO you might use to edit your instagram photos) and playing around with them. You should definitely tweak the presets and not just use them at face value (else it looks kind of obvious you used a preset, you know?) – then save it as a new preset, which you can apply to all images upon importing into Lightroom.
VSCO presets tend to give digital images a more film-like look, but they don’t necessarily work well on every travel image. I started with a Fuji Astia preset from the VSCO Film 04 Canon set and heavily tweaked it to make it my own. Every image is different, but in general I have the highlights down super low (around -85), clarity high (around 25-30), and whites high (around 50), all set under the Basic section. The VSCO presets also tend to adjust the saturation/luminance of individual colors, which is under the HSL / Color / B&W section. If I want darker skies, I’ll lower the luminance of blues here.
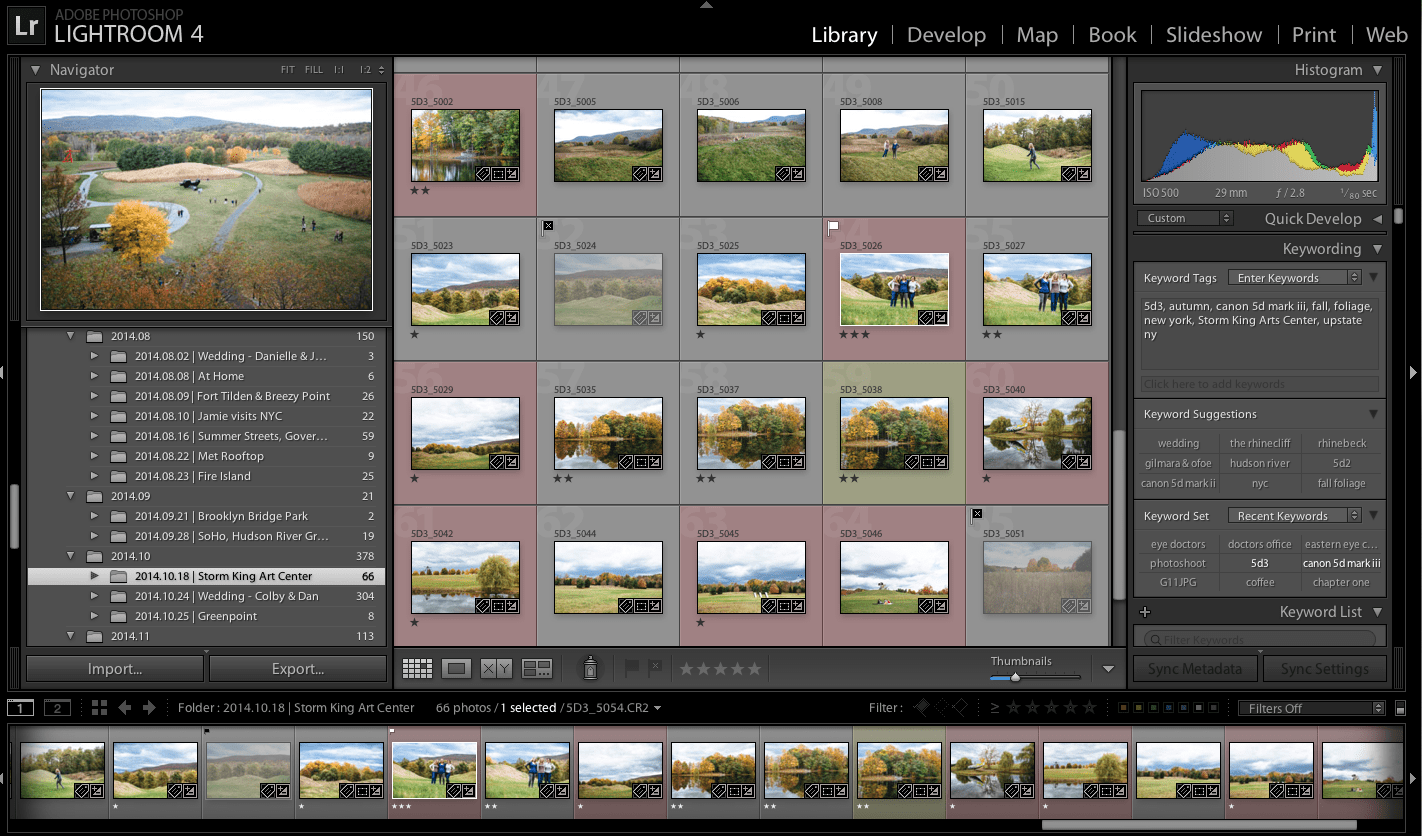
Categorizing/Rating Images in Lightroom
One big reason I use Lightroom instead of Photoshop is that it’s far more handy in terms of workflow. Not only can you edit images, you can also categorize them in several ways. After all – what good is having thousands upon thousands of gorgeous travel photos if you can never find them after the fact? Lightroom’s many categorization tools help keep everything organized and searchable.
Here’s what I do to keep my images organized in Lightroom:
- Tags – If there are any tags that apply to ALL images imported from Photo Mechanic into Lightroom, I will add them before importing (for example, the country and city are usually the same for the whole batch). Once the images are in Lightroom, I will go in and add additional tags as needed. Tags are SO important because they allow you to easily search your image archives. An added bonus for me is that these tags carry over when I upload photos to Flickr, which is where I save backups of all my photos.
- Stars – All my images should be starred already from when I imported them from Photo Mechanic, but as I go through and edit I may adjust their rating. 2 = really like; 3 and above = LOVE.
- Flags – When deciding which images are to be shared on social media, I filter to only show those rated 2 stars and above. The ones I select are then marked with a flag.
- Colors – When exporting images to be used in a blog post, I’ll mark them all the same color. If any images in this folder are already marked a certain color (from another blog post), I’ll choose a different color to use.
Sharing Photos Online
I am perpetually behind in sharing my travel photos with the world (because my editing backlog averages about 2 months), but here’s what I do with my final travel images:
- Upload (almost) all photos to Flickr – With an absurdly large amount of storage space, I use Flickr as a backup for all my high res images. I have a meticulous organizational system where all my photos are tagged appropriately and added to a relevant folder on my Flickr account. That way, it’s super easy for me to search for photos from past trips when I want to use them in retroactive blog posts or share them with people.
- Include some photos in blog posts – For each blog post I write, I open Lightroom and select the images I want to include, mark them all with the same color (so I know that I’ve already used that photo on the blog), and export them to the blog using the LR/Blog plugin.
- Share the best photos on social media – In Lightroom I’ll go through any images marked 2 stars or above, flag the ones I want to share on social media, and export low res versions to a separate folder. These will eventually get shared on Facebook; a few will supplement my iPhone images on Instagram.
How do you work on your travel photography? Any time-saving or quality-enhancing tips to add?